


- #1: Introduction
- #2: Setting up Next.js Project for testing
- #3: Writing the tests
- #3A: What should I test?
- #3B: Testing App Initial Load
- #3C: User can create a post
- #3D: User can edit a post (i.e This article 😁)
- #3E: User can delete a post
- #3F: Snapshot Tests and Conclusion
- #4: Are my tests enough?
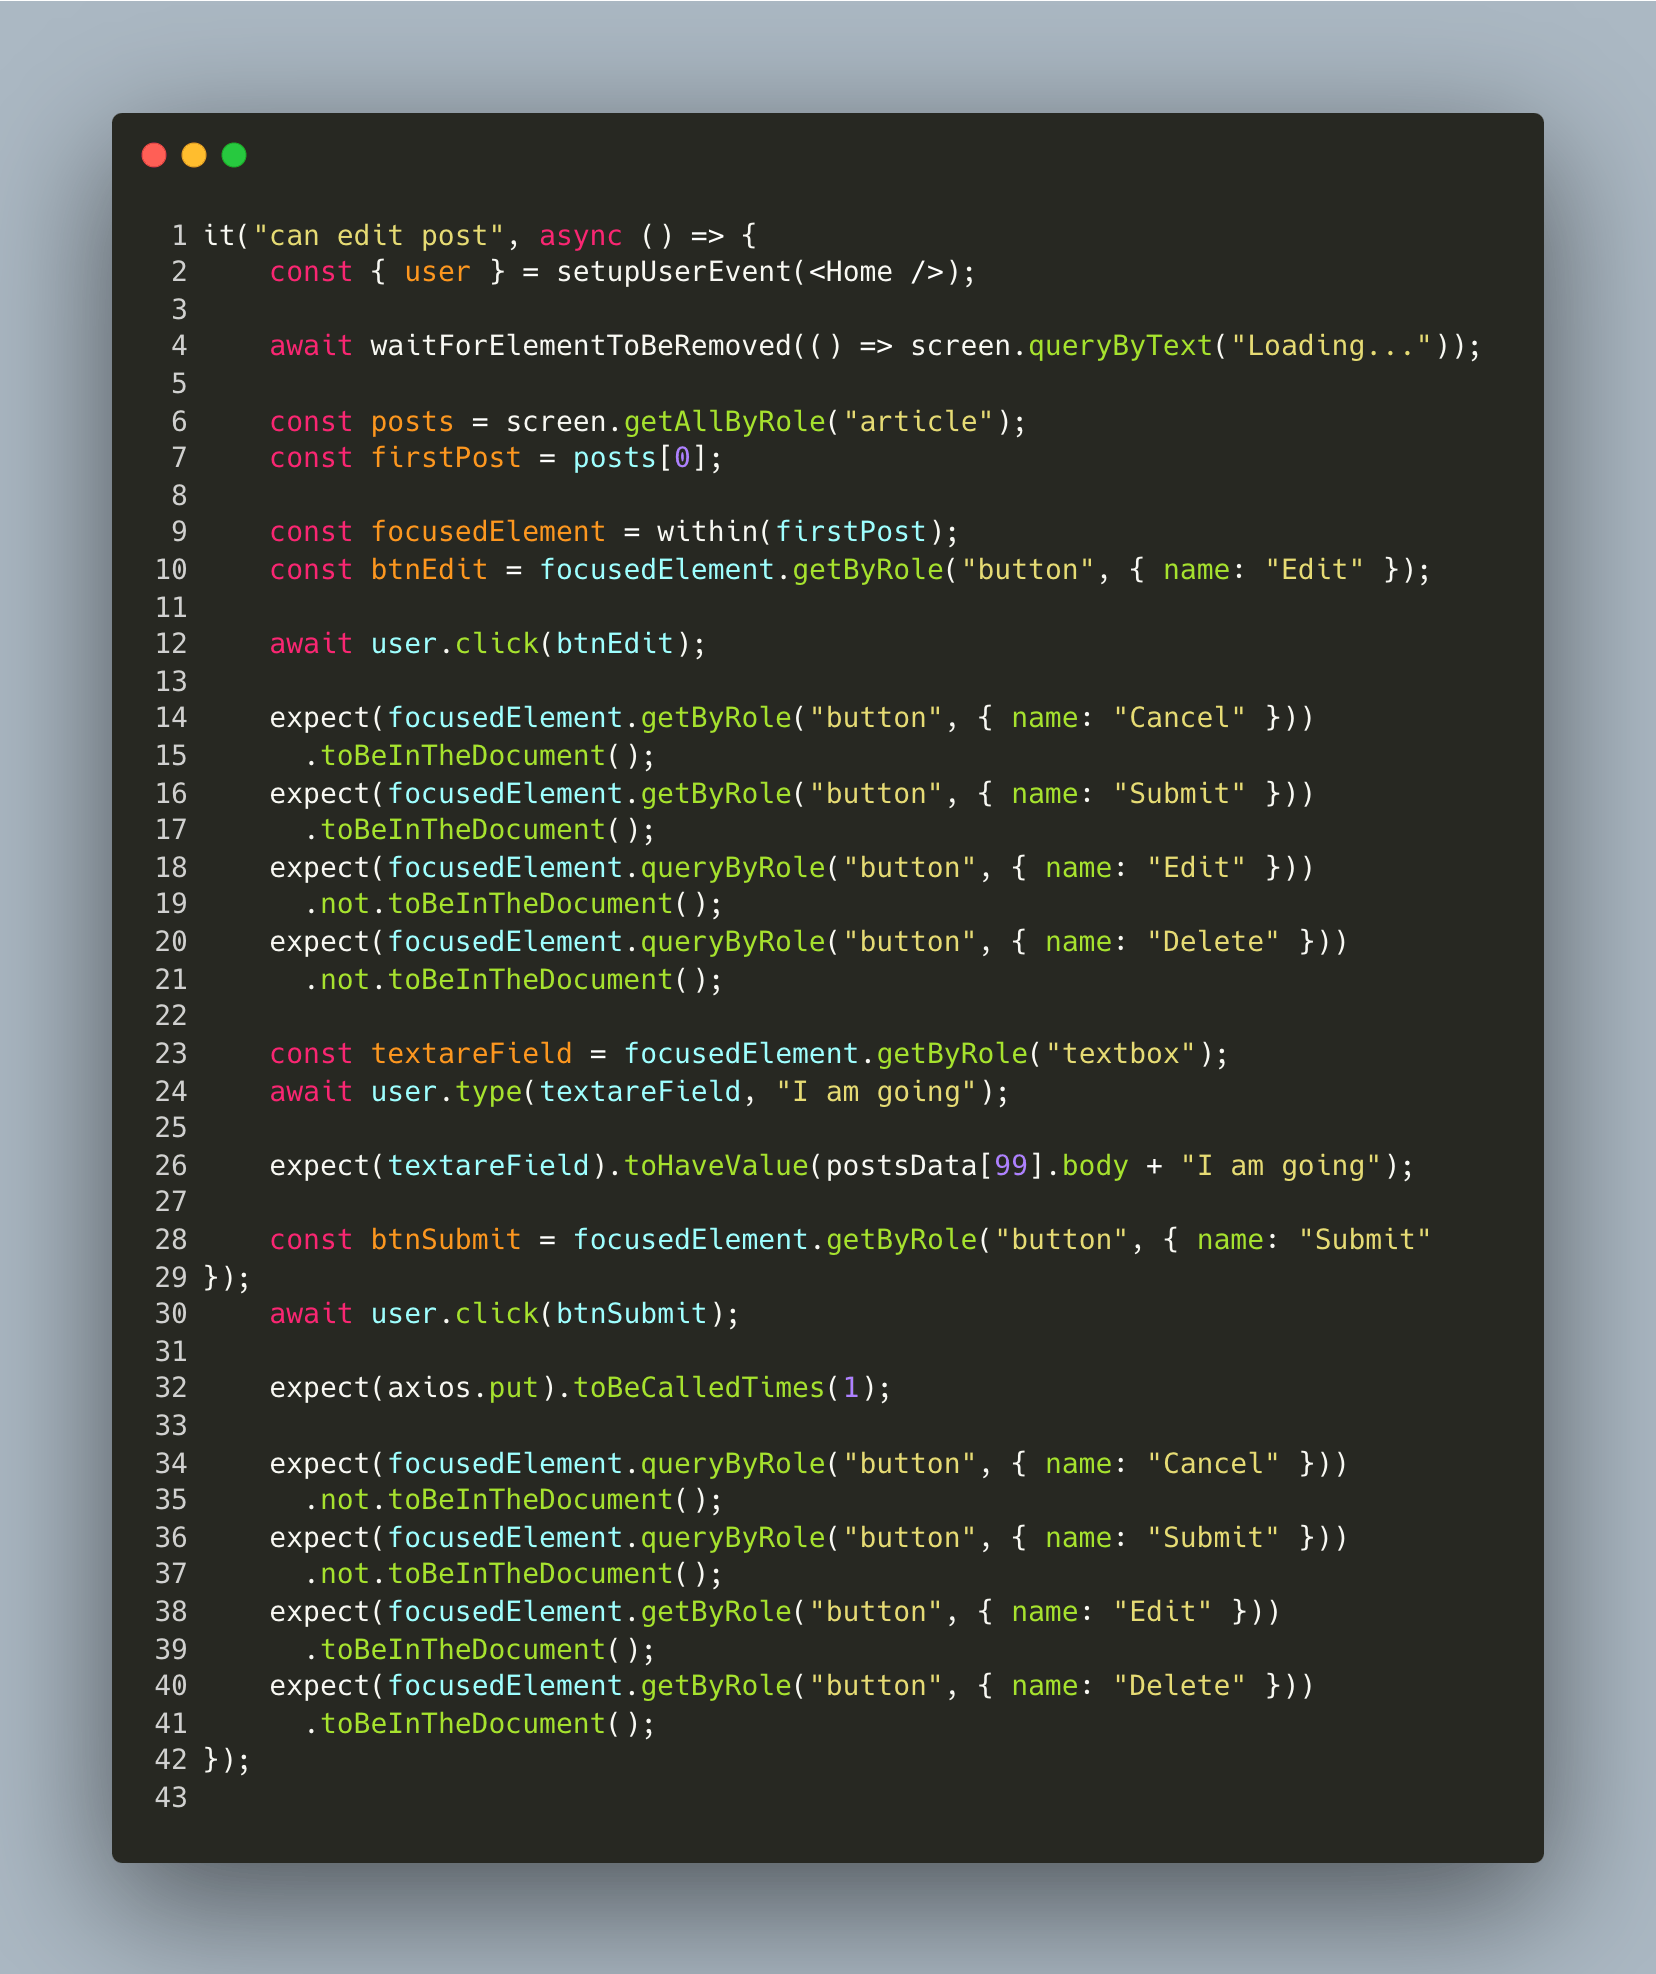
Line 1 : We write the description of our test
Line 2 : We render our Home component and setup user events on it
Line 4 : Since we want to edit a post, we need to ensure that at least some posts are available in our document. From our first user story, we know this occurs when the "Loading..." text is no longer in the document, so we wait for the "Loading..." text to be removed
Line 6 : We get the articles currently displayed in the document
Line 7 : Since we just need to edit only one, we select the first one
Line 9 : Our edit functionality has a couple of user interactions, so in order to "scope down" our element selection we use the within keyword. Unlike the screen keyword we have been using that searches the entire DOM for a particular element - the within keyword helps us search just the children of a particular element, hence the word within. So in this line we have decided we want to look within the first post and we assign that to a variable called focusedElement
Line 10 : Within our first post we select the edit button
Line 12 : We click the edit button
Line 14 : We assert that a "Cancel" button is now present "within our post". The purpose of this cancel button is just incase we want to stop the editing process. We simply click on the button and the Post UI returns to it's default state
Line 16 : We assert that a "Submit" button is now present within our post. As the name goes, this is used to submit our edit.
Line 18 : We assert that the "Edit" button is no longer within our post. Pay attention to the not just before toBeInTheDocument
Line 20 : We also assert that the "Delete" button, which is used to delete a post is no longer within our post
Line 23 : We get the textbox that's within our post. I'm sure you can now see where the within method really shines over screen. In this line if we used screen, we would have gotten both the textbox used to create posts and the textbox inside the post we want to edit. But since we used focusedElement which from line 9 is specifying within our first post, we only get the textbox inside our first post
Line 24 : Type "I am going"
Line 26 : Assert that the textbox now has value postsData[99].body + "I am going" .You may be asking where exactly did postData[99].body come from, I thought we only typed "I am going"? 🤔
If you look at our postsData here, we have 100 posts and out of those 100 we display only the last 10 on the DOM (i.e from index 90 - 99). Since we display postsData from 90 - 99 in DESCENDING ORDER, the first post on our page is actually postData[99]. The way each postData is structured the main text for the post exists in key "body", hence by default we display postData[99].body as our post text. Now when a user clicks on edit, we automatically position the user's cursor after the text already present. So when a user suddenly types "I am going" the textbox would have that value appended to whatever was already present (i.e postsData[99].body)
Line 28 : Get the submit button inside the post, since we already ascertained that it was present in "line 16"
Line 30 : Click the submit button
Line 32 : Confirm that an axios call has been made
Once the post has been successfully updated our post UI should update, so we can assert that those updates have taken place
Line 34 : Confirm that "cancel" button is no longer present. Pay attention to the not before toBeInTheDocument
Line 36 : Confirm that "submit" button is no longer present
Line 38 : Confirm that "edit" button is now back
Line 40 : Confirm that "delete" button is now back
🎉 We have successfully tested the entire edit experience of a post in our application